Efficiency in eLearning: Master Slides in Adobe Captivate 5 (Part II)
Greetings, Litmos community!
We’ve been taking a look at how to create efficiency when designing/developing eLearning in Adobe Captivate 5. Adobe recently added a killer master slide feature to Captivate.
If you’re familiar at all with how to use multiple master slides in PowerPoint, you have some idea of how effective this function could be when creating eLearning.
Master slides are cool. You can reuse elements (like backgrounds and text boxes) without pasting them in over and over again. You can create multiple masters for different slide types (e.g. intro, body, summary).
Why should you really care? The payoff:
- Master slides will save you time–massive amounts of time.
- Master slides limit mistakes and rework.
- Master slides allow you to direct your energy towards content; you won’t have to reinvent the wheel placing repeatable objects on each slide.
For example, I’ve been working on a delightful (and completely fictitious) course called Gaming 101. There are two main content areas (each with its own slide type): the odds for different casino games, and an etiquette guide for some of the world’s most sumptuous casino-hotels.
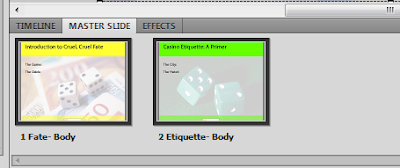
Throughout the course, I need to repeatedly create two types of slides to introduce chunks of content –so I’ve built two master slides:
Let’s take a look at our first master slide (the one we’ll be using for our discussion of the odds).
Everything you see is part of the slide master: the opaque yellow rectangle at the top, the semi-transparent rectangle at the bottom, the two text captions, the wholesome background image, etc.
Like in PowerPoint, you can name these masters. This one (our “odds” slide master) is called Fate: Body. As you would insert a new slide in PowerPoint with the desired name or layout, you can do something similar in Captivate 5–insert a slide and select what master to use from the Properties window (not shown, but it’s conveniently on top of you when you’re working in Captivate).
After inserting a new slide, we can add our slide-specific elements, such as additional text, graphics, and whatnot.
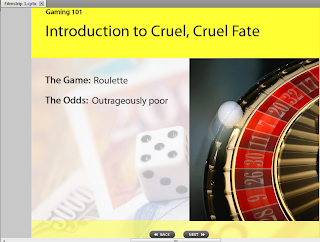
Here’s an example:We’ve added text to the right of our boilerplate, and an appropriate image (the roulette wheel). On the bottom, you can see stock Captivate image buttons for navigation.
Imagine if you had to do a slide like this for each game of chance. The master slide is an enormous time saver. You wouldn’t want endless repetition (i.e. 15 of these slides in a row), but you can use masters when repeatable elements make sense (such as introductory slides for each chunk of content).
Here’s an example of our Etiquette slide, master (top) and actual slide (bottom):
Pretty elemental stuff: we added the name of the place and the hotel (Macau; Lisboa), the buttons, and a picture of the hotel in question.
I would encourage you to learn master slides as you start using Captivate. This iteration of the software is terrific — you won’t have to deal with the heartbreak and baggage of a career spent without it.
Soon, we’ll look at some resources for learning more about Captivate: from Adobe and from the broad network of practitioners out there.
Cheers!
P.S. With a house edge of 5.6%, roulette is a lousy play. Stick with craps (0.6%) or blackjack (0.8%).


