Using video as an alternative to create learning content

The most common way to create an ‘eLearning Course’ is with a rapid-authoring tool like Articulate Storyline or Adobe Captivate. The longer I spend working in this industry, the more skeptical I become about creating content using these interactive tools. I don’t want to dismiss the effectiveness of interactive eLearning completely – I have delivered several successful projects with these tools.
However I’m becoming more and more intrigued by the effectiveness of video. Not only effectiveness, but also the speed in which high quality content can be created and subsequently delivered. Projects which once took months to develop and deliver can now be created in a matter of days – and we don’t need advanced technical skills to execute.
Another key aspect to delivering content via video is how much easier that type of content is to consume on mobile devices. Users just don’t want to be clicking on tiny buttons on their phone screens when they can watch a full screen video instead.
So let’s take a look at the different types of videos you can create:
1) Recording live training
Recording a presenter in a live classroom environment is one of the quickest ways to convert a live training session into online content. It baffles me that digital learning designers don’t use this technique more frequently!
People like watching people – it’s human nature (especially when the alternative is seeing bullet points or clip art on screen).
All you need is a tripod and a camera (you can even use the camera on your mobile phone to get started). To drastically improve the quality of the final video, you can choose any of the following techniques (starting with the most important):
- Use a lavalier microphone– Adding a simple lavalier microphone is the single most important thing you can do to drastically improve your video production. It is simply a microphone attaches to the collar of the presenter. These range in price, but I thoroughly recommend this one which is wired and can be used with a smartphone, or this one which is better quality and wireless for use with a camera.
- Break content down into microlearning– It’s a huge buzzword in eLearning at the moment and for good reason, breaking your content down into 2 to 5 minutes videos will let you create a bigger library and a simpler way for your audience to search content.
- Record presenter’s screen – If the presentation is supported by on-screen slides or a software demonstration, use screencasting software such as Camtasia or ScreenFlow and then splicing key sections of content amongst the video will keep the learner engaged.
- Add a second camera angle – This will allow the post production team to switch back and forth between the different camera angles. This will go a long way to improving the content for your audience.
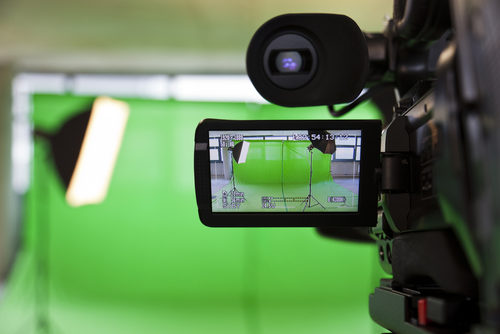
2) Recording a live presenter in a studio environment
Whilst this option sounds more expensive and more work than recording a live training session, it can be quicker and provide a more polished end product than an interactive learning option.
Finding a suitable location to record your training session is one of the main challenges. People often hesitate recording their content because they think they need a professional studio – you don’t! It is the recording equipment that is important! Check out this excellent video as an example.
3) Screencasting
Screencasting is a fancy name for recording your screen whilst talking into a microphone. You’ve probably seen hundreds of these types of videos on YouTube, if you’ve ever searched for tips on how to use software on YouTube then you’ve probably watched a screencast.
These types of videos can range from minimal costs (this would be the expert talking into his laptop whilst recording his screen) to the more expensive professional screencasts (these are scripted, have music and animated intros etc.)
If you’re interested in learning how to create your own screencasts, check out this article for some great tips.
4) Recorded webinar
One of the quickest and easiest ways to capture and deliver video content is via a recording of a live webinar. Most computers these days have a built-in microphone and webcam, so the key for this medium is finding presenters who are engaging and know their subjects.
One way to increase the value of a recorded webinar is to break the content down into smaller, bitesized lessons like we did with this example.
Whilst the quality of a recorded webinar isn’t always great, there is no quicker way of capturing the knowledge of an expert and being able to deliver it at scale.
5) PowerPoint with voiceover
Most courses designed in Articulate Storyline or Adobe Captivate are created in a slide format. The problem is that the level of interactivity that goes into each slide means that the development time and subsequent cost can increase to the point where the course can take months and tens of thousands of dollars to be delivered.
So why not create the same content in PowerPoint, but removing interactivity and just recording each lesson as a video?
If interactivity is required, it can be added in the form of quiz questions directly via the LMS. This form of content is far easier to view on a mobile device than trying to press buttons on an iPhone screen.
6) Whiteboard animated videos
Whiteboard videos have been all the rage over the past few years. To begin with, they were created manually and took a long time to develop. But then tools such as Videoscribe and GoAnimate appeared making it easy for anyone to get started.
These videos are quick to create and are an excellent way to explain processes and high-level concepts – check out this example which took less than a day to create.
One caveat is to use this type of video in moderation, because it can quickly become difficult to watch over a long period of time.
7) Animated explainer videos
There is no better way to tell a story than with an animated explainer video! I’m sure you’ve seen these both online and on TV.
These types of videos can range from extremely expensive, fancy productions created with tools like Adobe After Effects to quick, basic cartoon style explainer videos created with Powtoon.
This example is one of my favourite explainer videos. And here is another that I recently made for my own business.
8) Vlogging
Vlogging is ‘video-blogging’. These types of videos have gained popularity over the past few years with YouTube’s rise to power and the ease of recording video with a phone.
A vlog is powerful as a learning tool because it connects experts with their audience instantly. Not only that, it can provide a consistent way of updating audiences with ongoing material.
Whilst the most basic vlogs are simply videos recorded directly from the user’s phone and then uploaded immediately, some of the more popular vlogs are seeing more time spent on production, which means they take slightly longer to create but are still quick to deliver consistently compared with more traditional options.
I’ve recently launched my own vlog to help teach my community about building a business in digital learning – you can check it out here.
9) Combining several of the above techniques
The very best way to deliver video content is to leverage a variety of different types of videos content. Using a combination of the examples in this blog post will keep your audience on their toes, not knowing what to expect in the next video. Just like being captivated by a good movie or taken down a rabbit hole into YouTube, keeping our audience watching is important and therefore mixing up the format for how you create videos is an essential strategy.
Conclusion
As you can see there are so many ways to create content using video, I sincerely hope you consider this as an option next time you start a digital learning course.


